1. Define both interfaces and the installation path
Record the distribution-side termination and the customer-side termination separately. Specify connector family, polish type, fiber type, fiber count and whether one or both ends are factory terminated. An SC/APC drop cable description alone does not identify the mating enclosure, any hardened interface or the required environmental protection.
Describe each indoor, outdoor and transition section. Confirm the selected cable construction and local building-entry requirements for the actual route; connector color is not sufficient evidence of compatibility. The ZION FTTH drop-cable overview introduces available cable families, while the order still needs a confirmed assembly specification.
2. Measure the actual cable route
Measure along the proposed attachment or containment route, not between map coordinates. Include wall turns, rises, drops, building entry and the path inside the termination enclosure. Define start and end reference points so two surveyors do not measure different portions of the same installation.
For an aerial route, use the approved span and sag design rather than simply adding a percentage to ground distance. Record inaccessible sections as unresolved survey items. Photographs and a route sketch help explain a measurement, but neither replaces checking a blocked or uncertain section.
| Survey field | What to record |
|---|---|
| Work order and route revision | Unique household reference, survey date and approved route drawing |
| Endpoint references | Distribution terminal and customer termination positions |
| Measured route | Horizontal, vertical, entry and enclosure segments, with units |
| Unresolved conditions | Access restrictions, concealed sections and required revisit |
3. Record installation and service allowances separately
Use a transparent worksheet: required assembly length equals measured path plus explicitly approved allowances that are not already included in that measurement. State whether the supplier measures finished length between connector reference planes or by another convention, and agree the manufacturing tolerance.
Allowances may cover access at each termination or a designated service loop. Assign a purpose and storage location to each one. A surveyor, planner and purchasing team should not each add an independent safety margin. Spare inventory is a separate quantity decision, not another hidden length allowance.
4. Build length bands from measured samples
Compare candidate supplier lengths against the surveyed demand. A longer assembly is suitable only when its surplus can be stored within the approved bend and enclosure constraints. Keep unusual routes separate rather than forcing them into a convenient stock code.
The following arithmetic is hypothetical, not a recommended stocking range. It assumes a supplier has confirmed 30 m, 40 m and 50 m options and a tolerance that still satisfies each requirement. The residual column is ordered length minus required length; it is additional to the allowances already counted.
| Example route | Path + allowances | Candidate order | Residual |
|---|---|---|---|
| A | 26 m + 3 m = 29 m | 30 m | 1 m |
| B | 34 m + 4 m = 38 m | 40 m | 2 m |
| C | 43 m + 4 m = 47 m | 50 m | 3 m |
5. Check passage of the protected assembly
The limiting dimension may be the connector protection or pulling assembly, not the cable diameter. Check entry clearances, duct bends, access points and the approved installation direction. Obtain instructions for the exact assembly and pulling accessory before planning the installation.
Corning installation guidance illustrates why preconnectorized cable handling depends on the assembly and pulling arrangement. Its product-specific instructions must not be transferred to a different supplier assembly. A dust cap protects the end face; it does not by itself make the connector a rated pulling point.
6. Make each household kit traceable
Connect the work-order ID to the cable length, end-A and end-B interfaces, assembly identifier and approved accessory list. Include a termination box, adapter or fixing accessory only when its part and quantity are confirmed. Package connectors so the caps remain secure and the fiber is not trapped under other components.
Use the same kit ID on the outer package and packing record. Link inspection records to the supplied assembly or batch as agreed in the purchase specification. Where privacy matters, use a work-order reference on the outer carton instead of exposing the household address.

7. Pilot representative routes before bulk release
Select a pilot covering short and long routes, tight entries and different endpoint combinations. Record fit, usable length, remaining cable storage, kit completeness and optical acceptance results under the project test plan. A successful fit check alone does not demonstrate optical performance.
Resolve deviations, revise the kit bill of materials and freeze the length convention before ordering. Send the supplier a quantity matrix by length and interface combination, packaging requirements, inspection records required and the revision used for release.
Frequently asked questions
Is one allowance percentage suitable for every FTTH route?
No. Record allowances by purpose and location, using the route design and assembly requirements. Avoid counting an allowance already included in the survey.
Can a longer stock cable always replace the planned length?
Only if the interfaces, cable specification, minimum usable length and surplus storage arrangement are acceptable for that route.
What should accompany an RFQ?
Provide the route-based length matrix, interface definitions, quantities, assembly length convention, packaging list and required inspection records.
Prepare Your Project Requirements
Share route or connection records, required specifications, quantities and documentation needs to support product and order review.



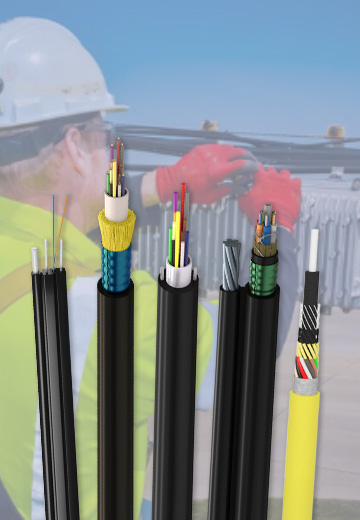 Fiber Optic Cable
 Fiber Optic Tools
 Ethernet Cable
 Coaxial Cable
 Fire & Security Cable
 Voice, Audio & Video
 Power & Control Cable